Showing posts with label Bread. Show all posts

Sunday, July 28, 2013

Caramel Banana Upside Down Bread


It's a bread....... it's a cake! Who cares, it's yummy!  It taste like cake to me...like really, really, good cake but it's cooked in a loaf pan so perhaps it's a bread?  

I am not even that big of a banana bread lover but this is like 'naner bread on flavor steroids!  The brown sugar mixed with butter and topped with sliced bananas is a great start, then topped with salty caramel sauce?  A complete show stopper!

NOTE: When I have over ripe bananas but no time to make something with them...I just toss the whole thing in the freezer...peel and all!


Caramel Banana Upside Down Bread - (adopted from daringourmet.com)

Ingredients
½ cup packed brown sugar
3 tablespoons unsalted butter, cut into several pieces
About 2 bananas, sliced in ¼ inch rounds
½ cup chopped walnuts or pecans (optional)
1½ cup whole wheat flour
¾ cup white granulated sugar
1 teaspoon baking power
1 teaspoon baking soda
½ teaspoon salt
¼ teaspoon ground cinnamon
1 cup mashed overripe bananas
2 large eggs
⅓ cup vegetable oil
⅓ cup buttermilk
1 teaspoon vanilla extract

For the Caramel Glaze:
2 tablespoons butter
2 tablespoons brown sugar
2 tablespoons heavy cream
1 teaspoon kosher salt (optional)

Instructions
Preheat the oven to 325 degrees F. Coat a 9 x 5 loaf pan with non stick spray.
Melt butter in microwave.  In small bowl, combine with brown sugar. Stir the mixture until dissolved and spread evenly on the bottom of the pan. Place a single layer of the banana slices on top of the sugar mixture along the entire bottom of the pan.

 
Combine all dry ingredients in a large bowl. Add all the remaining wet ingredients and beat just until combined. Do not over stir.
Pour the batter over the sliced bananas in the pan.
Bake for 1 hour or until a toothpick inserted into the middle of the loaf comes out clean but moist.
Allow the cake to cool in the pan for 20 minutes before inverting it on a cake platter.
 
 Caramel Glaze :
 Place the butter,  brown sugar and heavy cream in a microwave safe dish. (I find a Pyrex measuring cup works well).  Heat on high for one minute, stir and heat an additional minute until mixture boils.  Spread on top of upside down bread.  Sprinkle with salt if desired (I love the addition of salt!)


Wednesday, July 3, 2013

Peach Cobbler Muffins


Summertime and the peaches are perfect!    I love fruit filled muffins and these are particularly yummy!
Easy (of course, or I wouldn't be bloggin' 'em), and perfect for breakfast or top with ice cream for a lovely dessert!

The recipe calls for buttermilk which I never have on hand, but you can use a mixture of milk and vinegar to get the same results! 1 tablespoon vinegar for every cup of milk should do it.  You will notice the vinegar will curdle the milk which is exactly what you want!


Ingredients

2 cups unbleached all-purpose flour

¾ teaspoon baking powder
1 teaspoon baking soda
1 teaspoon salt
½ teaspoon ground cinnamon
¾ cup granulated sugar
1 cup buttermilk (or scant 1 cup of milk with 1 tablespoon vinegar)
5 tablespoons vegetable oil
1 large egg
¾ teaspoon pure vanilla extract
1½ cups peeled, sliced,  fresh or unthawed frozen peaches
Turbinado sugar for sprinkling

Directions
Preheat oven to 350 degrees.    Lightly spray 12 large muffin cups with vegetable oil spray or line them with paper muffin cups.
In a large mixing bowl, whisk together the flour, baking powder, baking soda, salt, cinnamon and granulated sugar.

In another bowl, whisk together the buttermilk, oil, egg,  and vanilla extract. Pour the wet ingredients over the dry ingredients and mix just until combined. Gently fold in the peaches, using as few strokes as possible; be careful not to overmix.
Fill muffin tins about 2/3 of the way full.
Bake for 25 to 30 minutes, until the muffins are golden brown.
The tops should be firm to the touch and a toothpick inserted in the center of a muffin should come out clean. Remove from the oven and let cool for 10 minutes.


.

Thursday, April 18, 2013

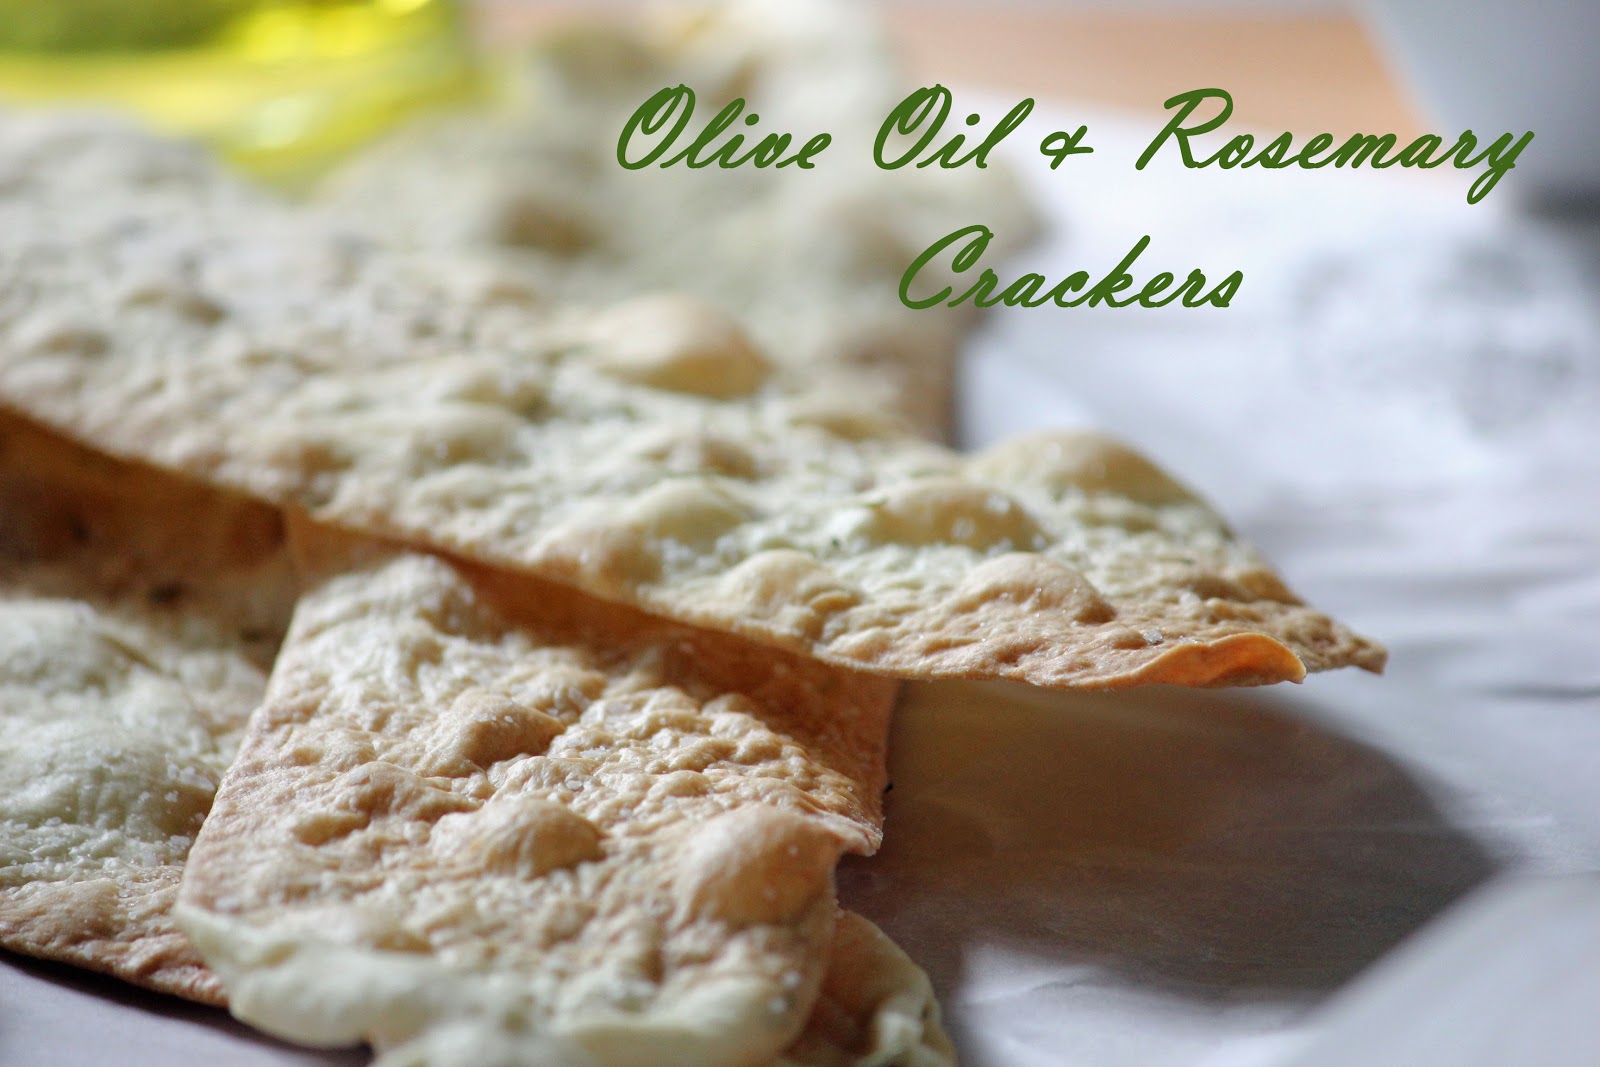
Artisanal Crackers with Olive Oil & Rosemary


Every once in awhile you run into a recipe that makes all this blogging worth it!  And this my friends is it!
It is everything I want my recipes to be.    Simple, fresh, easy to make, versatile and yummy!  I can hardly wait to make them again! 

And where did I run across this piece of recipe perfection?  If you have read my blog at all, you will see my pal Rob's name throughout.  Rob is my Blog Muse.   But this recipe came from Rob's partner, David!  David is an uber talented decorator...their home is simply amazing...and apparently he is working on his culinary skills as well!   Thanks for sharing David!

 Couple notes:
  •  Roll  out as thin as possible.  They transfer to a baking sheet easily, even though they are paper thin. 
  • After topping with salt, use a rolling pin to gently press the salt into the dough before baking.
  • Use good salt (I used Kosher). Use good Olive Oil (Extra Virgin) and fresh Rosemary.
  • I made mine rustic, but you can cut into any shape you prefer.
  • Vary this recipe easily with any herb or leave plain...good no matter what! 
  • Oh and each large cracker only has 66 calories...munch on!
Ingredients

1 3/4 cups flour
2/3 cup water
1/4 cup good olive oil 
1/4 teaspoon salt

Preheat to 425

Mix all ingredients in your *Kitchen Aid using the bread hook.  Knead for 5 minutes or so until dough is silky smooth  
Let it rest for 20 minutes
 (*if you don't have a Kitchen Aid, your hands will work just fine! Just make sure you knead it well.) 


Cut dough into 8 small pieces. 
 
 
 Roll out each piece on well floured board until very thin. Each piece will make 2 long crackers. 


Place on silicone mat, parchment paper or spray cooking pan lightly with non stick spray.


Bake for 10-15 minutes or until lightly brown.


Wednesday, April 10, 2013

Jelly Donut Muffins


I've been making these for years.  The recipe is from my favorite cookbook of all time.  The Complete Cooking Light Cookbook.  They are called Raspberry Filled Cinnamon  Muffins in the book but they are so tender, like a donut, I changed the name and the filling!

The Complete Cooking Light Cookbook

I am not sure, but I think this was the first edition printed.  There have been several since, but none as good as this version from 2000.  I use this book more than all my cookbooks.... combined and I got a few books!  It's my moms favorite too.

These are tender, very delicate and super easy to make.  I use seedless strawberry jam to mimic the filling of a jelly donut but you could use whatever you have on hand.

When my daughter was little and had a bad day...we used to make muffins...because when the going gets tough, the tough make muffins!

Friday, December 21, 2012

Super Buns! - The Easiest Homemade Rolls Ever!


When I first saw this recipe I was convinced it wouldn't work.  But what kind of bun lovin' woman would I be if I didn't try it!  They were not only great, they were bunalicious!  Who wouldn't want perfect buns?  Remember my recipe for Sweet Sexy Dinner Rolls?  Well these taste just like 'em only they are half the work...winning!

 I don't remember where I first saw the recipe, probably Pinterest...but I finally settled on this one from Jamie Cooks It Up, a very well done blog.

The wonderfulness of these are that they are basically no rise.  You put them in the oven at 170 degrees for 30 min, then turn the heat to 350 and they are done in 30 minutes.  It's a miracle...really, it really is.

Tuesday, November 20, 2012

Panini 101 - Make the perfect Panini! No Special Equipment needed!


 You can use this basic recipe to make homemade Panini's that are as good as any fancy sandwich shop or restaurant.  I used fresh Mozzarella, Pesto and Roasted Red Peppers for a Caprese style Panini.  

 I substituted  Roasted Red Peppers instead of traditional tomato because I think it adds a lot more flavor and tomato's can make  your sammie mushy.  If you use tomatoes, be sure to deseed or chop in pieces before grilling.

This is more of a technique than a recipe.  You don't need a fancy Panini press to make these.  All you need is a non-stick grill pan, a heavy pan to weight it down. (like cast iron or even a dutch oven will work) and a piece of foil. 

Bread - oh so important when making the perfect Panini.  I have tried several, but my favorite is sourdough.  It is crunchy, but soft enough to eat. The grill marks show up nicely too.  Some of the Artesional breads like are so tough that you can't get through the bread to get to the ooey gooey center!  Sandwich frustration!

A few variations
Southwestern:  sliced chicken, grilled onions and peppers, pepper jack cheese
Ham and Swiss: ummm, well, Ham and Swiss
Burgers: Grilled Burger, Caramelized Onion, Bacon and Gouda
Egg and Prociutto: Fried egg, Prociutto and Pesto

The combinations are endless...just put your favorite sammie ingredients between two slices of buttered bread, grill, press and you are a sandwich hero!


Saturday, September 22, 2012

Starbucks Pumpkin Bread


As some of you may know, I work for Starbucks...and no, I do not have any inside information on the recipe for this bread...but what I got is a daughter who is an amazing cook and loves Pinterest!  She found this recipe yesterday and whipped it up last night, and it tastes just like the Starbucks stuff...except hers is better because she added frosting.  I just love the way that brain of hers works!
Now if Starbucks sues me for plagiarism, I can only hope they sue the the gal who originally posted it on Pinterest.  Notice, I didn't mention her site...us bloggers stick together :)  


 Ingredients

1 ½ cups flour
1 teaspoon baking soda
½ teaspoon baking powder
¾ teaspoon ground cinnamon
½ teaspoon ground ginger
¼ teaspoon ground clove
¼ teaspoon ground allspice
½ teaspoon salt
4 eggs
1 cup sugar
¼ cup dark brown sugar
½ teaspoon vanilla
¾ cup canned pumpkin
¾ cup vegetable oil
1 cup butter cream frosting (store bought works great)

Directions

Preheat oven to 350 degrees.

In a medium bowl, combine flour, baking soda, baking powder, spices, and salt and whisk to combine. Set aside.

In a large bowl, beat eggs, sugars, and vanilla on high speed for about 30 seconds. Add dry ingredients and mix. Add pumpkin and oil, mix to combine. Pour batter into a 9x5 greased loaf pan.

Bake for 60 to 70 minutes or until the top of the bread begins to brown.

When the bread is cool, top with frosting and slice.

Tuesday, July 17, 2012

Cappuccino Biscotti with Chocolate Bunny Drizzle


Biscotti is so very easy to make, easier than cookies and really impressive as a gift.
This particular recipe includes coffee and a little milk to give it that cappuccino flavor.    
How is it that they are drizzled in chocolate bunny you ask?   I had this beautiful Dove Chocolate bunny that had been decapitated by my daughter on Easter but  never touched again. I just couldn't see chucking the poor little guy, head or no head, it was still chocolate and good chocolate at that!  So, I chopped it up, threw some in the biscotti and melted the rest for glaze.  Damn clever if you ask me!  You could certainly use chocolate chips if you don't have a decapitated bunny lounging around.


Thursday, June 7, 2012

Homemade Focaccia Bread with Fresh Rosemary


I tried quite a few recipes for Focaccia before landing on this one. Some were to thin, too dry, too thick...this one is perfect!  It could be because you cook it in a small pool of olive oil and who wouldn't like that?  The extra oil in the pan makes a crusty bread and the olive oil adds a deep flavor but it does not taste oily at all.    The original recipe is from Ann Burrell, (funky, spikey blonde hair lady on Food TV)  I've been told if I would sprout about 3-4 inches, I would be a an Anne Burrell look alike...I would be okay with that!

 I used a Kitchen Aid and dough hook, but you could certainly just go in with your hands.  Give it a long first knead though,  you want it smooth and silky.

Thursday, May 17, 2012

Homemade Garlic Croutons


For my friend Holly who is always looking for new uses for old bread! 

I used wheat, white and threw in a few stale Sweet, Sexy Dinner Rolls.  Made a nice medley!
This is one of the few recipes I have that is actually better with garlic powder in lieu of fresh garlic. Fresh garlic tends to burn and just lay on the bottom of the pan when cooking at high heat.
You can also add a sprinkle of Parmesan right when you take them out of the oven. 
These make your usual salads really special and they are so easy to make!

Wednesday, March 7, 2012

English Muffin Bread


Oh my what a whirl wind couple weeks!  New job (more about that later...so excited!), new camera, new Iphone and new computer on it's way...I am in technical pergatory!  

Thank heaven for bread...glorious bread with melted butter and jam.  (sorry no pictures of that...it went too fast, my photo would have been a hand to mouth blur!)
With just a few ingredients, you can turn out some amazing bread with a texture similar to English muffins.  It toasts up perfect for days and makes remarkable french toast.

Now, I haven't been able to master my camera...or my Iphone for that matter but I got bread baby...I got bread.

 NOTE: I use a Kitchen Aid mixer with dough hook for all my bread recipes...but you can easily convert this to a bread machine recipe or just go on in there with your hands and mix it up!


Thursday, February 9, 2012

Pita Bread - Syrian Style


My Mom and Dad were awesome cooks when I was growing up...we even had a small restaurant for a few years.  My Dad liked to cook things that took a lot of time... recipes that almost had an element of science to it.  Bread fit the bill perfectly.   My Dad, being the kinda guy that thinks too much...even went so far as to have a steel plate cut to fit our oven so he could bake up the perfect 'Syrian Bread'...that's what we called it "Syrian Bread'.  The term pocket bread or pita bread had not been coined yet.  In fact the only other place (other than my Dad's kitchen), that you could get the stuff was at a little middle eastern store in the bottom of the Pike Place Market. 

Recently while visiting my mom she gave me Dad's hand written recipe for Syrian Bread.   It was almost painful to see it, painful but wonderful...remembering my Dad through his recipe and his handwriting and then baking from it...it is stuff like this that makes me love food.  It isn't the eating (although I do plenty of that), it is the memories, the family traditions and the serving to those you love that make me a real, true, bonified Foodie.  I know my Dad is smiling right now and that is a mighty happy thought!

Being a bit of a bread maker myself, I didn't have a hard time following his recipe but I think I have made it a bit easier to follow.  I kept true to his ingredients though...wouldn't change that for nothin pops!


Ingredients

2 1/4 to 2 3/4 cups lukewarm water (110-115 degrees)
2 packages dry yeast
a pinch of sugar
8 cups all purpose flour
2 teaspoons salt


Directions

Combine 1/4 cup warm water, yeast and a pinch of sugar in a small bowl.  Let sit for about 10 minutes or until it doubles in size.


In large bowl or in a Kitchen Aid using the dough hook (which is what I used), combine flour and salt.  Make a well in the center and add the yeast mixture.  Gently mix ingredients. Add additional water, 1 tablespoon at a time until dough reaches a soft consistency.  Continue to knead for 5 minutes.  Lightly oil large bowl and add dough.  Let rise about 45 minutes or until it is double in size.

Punch down dough and divide into 8 equal pieces (12 if you want a smaller bread).  Shape into rounds and let rest 30 minutes.


Put baking stone in oven and preheat to 500 degrees.  If you don't have a baking stone you can use a cookie sheet but be sure it's a sturdy one...500 degrees is mighty hot!

Roll each round out to desired size (8" for large and 6" for small) and let rest another 30 minutes.

Carefully, place two dough rounds on hot baking stone and bake for approximately 6-8 minutes or until puffed, lightly brown and steaming.

Repeat process until all bread is baked.

Cut open and stuff with your favorite sandwich ingredients or just smear with butter hot out of the oven! 

Will stay fresh for 3 days or so and frozen for 30 days if sealed in ziploc freezer bags.


Thursday, February 2, 2012

Sweet Sexy Dinner Rolls - One Rise!


I posted this recipe several months ago and I  knew I liked the recipe, but something about it was so average.  I wasn't jumping on the bed yelling "I love me some buns!" and really, that's what you should be doing when you find good bread.  You guys do that don't you?  I mean jump on the bed and stuff when you have good food? Oh jeeze, I'm a food weirdo...whatever.
Anyway, I made them again tonight and my hubby is upstairs remaking the bed.  Perfection...the buns I mean, the bread...can you stutter when you blog? 
Bottom line:...(still laughing).  Try this recipe...you might mess up the bed a bit with your foodie dance...but it is so worth it!
p.s. these are one rise rolls, from start too finish in just over an hour if your proof in a warm oven...another reason to whip up a big old sexy batch of buns!


Ingredients

1/2 cup water
1/2 cup milk
1/3 cup sugar
1 package yeast (.25 oz)
1 teaspoon salt
1 egg
1/3 cup softened butter
3 3/4 cup white flour
1/3 cup melted butter to brush on the top

I use a Kitchen Aid with the bread hook feature for this recipe...but you can use a bowl and your hands and get the same result!

Mix the milk and water in a microwave safe dish and microwave for 1 minute or until the liquid reaches 110 degrees (just a bit warmer than body temperature...just dip a finger in and check :)   add sugar and mix to dissolve.

Add yeast to warm liquids. Let sit about 10 minutes or so until the mixture becomes a bit frothy.

Add salt, egg and softened butter and mix until combined. 
Add flour, 1 cup at a time until well blended. 
On medium speed, knead dough for 5 minutes until smooth.

Spray a baking sheet with non stick spray. Cut and shape dough into desired shapes.


Cover with a clean cloth and put in a warm place for 1-2 hours or until double in size. (I heat my oven to 300 degrees for 5 minutes then turn off...makes a  nice warm spot for the bread to rise).

Preheat oven to 400

Brush with melted butter and bake for 10-15 minutes or until golden brown. Brush with additional butter and sprinkle with salt if desired.

Monday, December 19, 2011

Cheesey Spedini Bread


Oh yeah, that's what I'm talking about!  This bread goes with everything...I mean everything...you could probably have it with a bowl of captain crunch in the morning and all it would do is make  your cereal taste better! 
Not...I repeat, not a diet bread...one cup of butter my friends...yep, one cup of butter...be still my clogging arteries.

Ingredients

1 loaf french bread, sliced (sourdough works well too)
1 package, presliced mozzarella or provolone (about 1 lb)
2 cubes butter, softened
2 cloves garlic, finely minced
2 teaspoons dried basil

Preheat oven to 350 degrees.
In a small bowl, combine 2 cubes butter, garlic and basil.  Mix well. (note my photo only has one cube...I made a half loaf, watching my girlish figure :)

Spread butter on both sides of bread. Lay one piece of cheese between each slice.

Rub a bit of butter on top of the loaf.
Wrap in foil, leaving the top of the bread exposed.

Bake for 15-20 minutes until everything is all ooey, gooey and full of cheesy love!


Tuesday, December 13, 2011

Blueberry Muffinosity!


When the going gets tough, the tough make muffins!  It's so therapeutic. When Rachel was little and had a bad day, we would  make muffins after school, talk and laugh...it was, and is, so calming. I still make muffins for friends, neighbors and those that are worthy of true muffinosity. (a new culinary buzz word :)   I have tried so many different muffin recipes but this is still my number one go to, tried and true, can not dork it up muffin recipe!

 This is a very versatile recipe...substitute any fruit you like, chopped peaches are wonderful!  Vary the yogurt flavor as well and come up with your own favorite!
Great for holiday mornings.

Ingredients

2 cups flour
1 tablespoon baking powder
1/2 teaspoon salt
1 egg
1 cup sugar
1 8 oz container vanilla yogurt
1 1/2 cups blueberries
1/4 cup raw sugar (regular granulated sugar will work too)

Preheat oven to 350 degrees.  Grease or line a 12 cup muffin tin.
In medium bowl combine flour, baking powder and salt.
In another medium bowl combine egg, sugar and yogurt.
Toss blueberries in flour mixture.  Make a well in center and add wet ingredients.
This is where you want to be careful....fold/mix gently until just combined.  The batter will be a bit dry and that's okay...over mixing will yield a tough, purple muffin.

Fill muffin tins almost to the top...I like a big old muffin!

Sprinkle with raw sugar.

Bake for about 20-25 minutes until a toothpick comes out clean.

Yumbo!


Saturday, November 12, 2011

Fluffy Pancakes

I have tried a whole lotta pancake recipes over the years and this one is the best by far!  Easy, consistent results and you most likely have the ingredients on hand...toss that Bisquick my friends...these are just as easy and so much better!

Ingredients
  • 3/4 cup milk
  • 2 tablespoons white vinegar
  • 1 cup all-purpose flour
  • 2 tablespoons white sugar
  • 1 teaspoon baking powder
  • 1/2 teaspoon baking soda
  • 1/2 teaspoon salt
  • 1 egg
  • 2 tablespoons butter, melted
  • cooking spray

Directions

  1. Combine milk with vinegar in a medium bowl and set aside for 5 minutes to "sour".
  2. Combine flour, sugar, baking powder, baking soda, and salt in a large mixing bowl. Whisk egg and butter into "soured" milk. Pour the flour mixture into the wet ingredients and whisk until lumps are gone.
  3. Heat a large skillet over medium heat, and coat with cooking spray. Pour 1/4 cupfuls of batter onto the skillet, and cook until bubbles appear on the surface. Flip with a spatula, and cook until browned on the other side.

Monday, November 7, 2011

Bacon, Cheese and Onion Biscuits

I used to do a lot of event planning....and one of the places I looked forward to every year was the Mountain Springs Lodge in Leavenworth Washington...it wasn't just because it is so beautiful, although it is...it was the scalloped potatoes. Little puffs of heaven. I told my friend Laurie, when my time comes, I want to be buried in my blue frilly dress with a cup of those scalloped potatoes...and now, I must add one, please throw in this biscuit! Sorry Laurie, I know you will be busy, planning my party and all...but I really need this biscuit when I go to food heaven. Just chuck one in when no ones looking...thanks pal.
p.s. I borrowed this recipe from browneyedbaker.com the blog site I want to be when I grow up. I just changed the shape of the design a bit...turned it from scone to biscuit.
Ingredients
3 cups all-purpose flour
1 Tbsp. baking powder
1 tsp. salt
1 Tbsp. freshly ground black pepper
1 stick chilled unsalted butter, cut into small cubes
1 1/2 cups grated cheddar cheese
4 green onions, thinly sliced
10 slices bacon, cooked and chopped into 1-inch pieces
3/4 to 1 1/2 cups buttermilk
Heavy cream, optional**
1 large egg
2 tsp. water
**Heavy cream may be substituted for half of the buttermilk.
Preheat oven to 400.
Using a mixer fitted with a paddle attachment, combine flour, baking powder, salt and black pepper in a large bowl on low speed. With mixer running, gradually add cubes of butter until the mixture is crumbly and studded with flour – butter bits about the size of small peas. Add grated cheese and mix just until blended. (This can also be done by hand: In a large bowl, stir together flour, baking powder, salt and black pepper. Gradually cut in butter with a pastry blender or two knives until mixture resembles small peas. Stir in cheese.)
Add green onions, bacon and 3/4 cup of the buttermilk to flour and cheese mixture.
Mix by hand just until all ingredients are incorporated. If dough is too dry to hold together, use remaining buttermilk, adding 1 Tbsp at a time, until dough is pliable and can be formed into a ball. Stir as lightly and as little as possible to ensure a lighter-textured scone. Remove dough from bowl and place it on a lightly flours flat surface. Pat dough into a ball. Using a well-floured rolling-pin, flatten dough into a rectangle about 8 inches long and 1/2 inch thick. Cut dough into 8 to 10 equal squares, depending on the size biscuit you prefer.
(and yes, that is a play dough rolling-pin! I happen to think it works like a champ...)

Whisk egg and water in a small mixing bowl to combine. Brush each wedge with egg wash. Place scones on a Silpat or parchment paper-lined baking sheet and bake for 18 to 20 minutes, or until golden brown and no longer sticky in the middle. Serve warm.