Showing posts with label Sauces and condiments. Show all posts

Friday, May 24, 2013

Homemade Lemoncello!


When life gives you lemons...soak 'em in booze! 

I love the idea of homemade booze...who knew?  When I think about all the stuff you could soak in Vodka it makes me all woozy!   Vodka is a neutral spirit, it goes with everything!

This is stuper easy (a little boozy  humor).  Steep lemon peels in your favorite vodka for about 5-7 days...add some simple syrup and you are locked and loaded (more boozy  humor)...crack myself up!  Oh yeah, fun photo shoot friends, very fun photo shoot...hicuup.

Ingredients

1 fifth Vodka
2 pounds lemons (about 10)
2 cups sugar
2 cups water
Sterilized container with tight fitting lid (like a large jar)

Peel yellow skin off of lemons being careful not to get the white pith (it will make your Lemoncello bitter and kinda pith ya off).


Mix Lemon peelings and vodka in large jar with tight fitting lid.
Store for 5-7 days in a cool dark place.  Give it a shake a day if you can...


Combine sugar and water in saucepan.  Heat to boiling and cook for 10 minutes until all sugar is dissolved.  Cool to room temperature.

Drain lemon peels from vodka and toss.  Pour desired amount of sugar mixture into vodka.  I used about 1 1/2 cups...but whatever tastes good to you!


Thursday, April 18, 2013

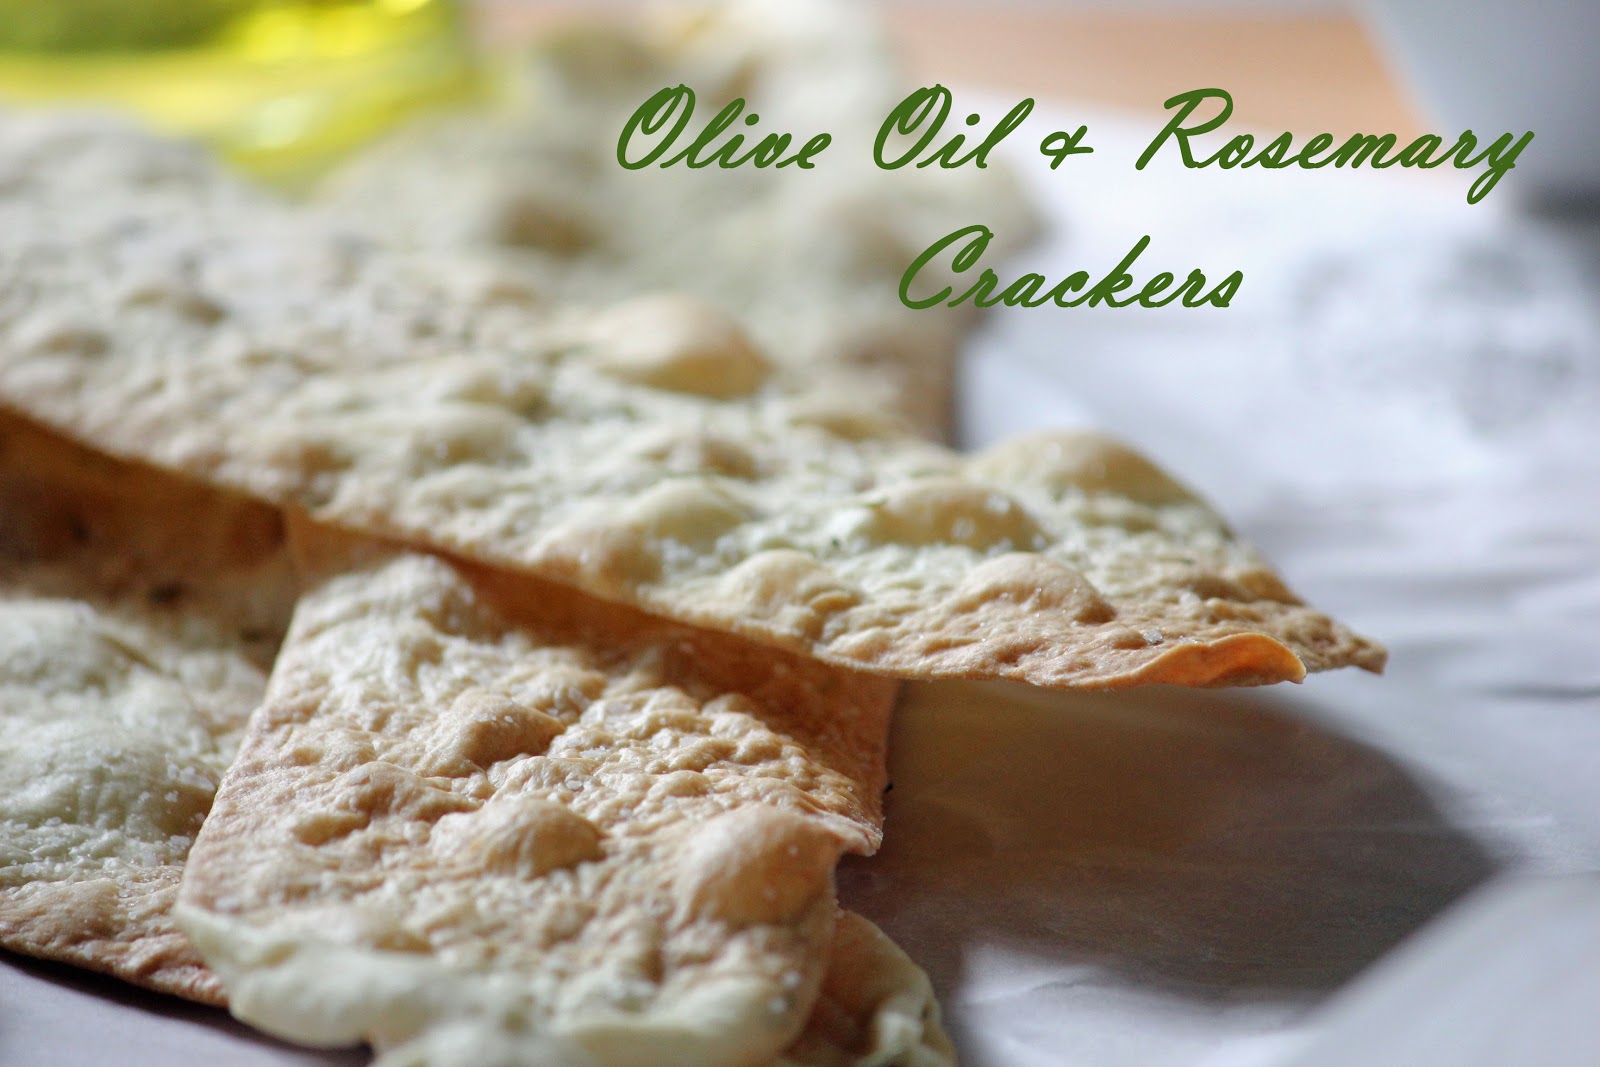
Artisanal Crackers with Olive Oil & Rosemary


Every once in awhile you run into a recipe that makes all this blogging worth it!  And this my friends is it!
It is everything I want my recipes to be.    Simple, fresh, easy to make, versatile and yummy!  I can hardly wait to make them again! 

And where did I run across this piece of recipe perfection?  If you have read my blog at all, you will see my pal Rob's name throughout.  Rob is my Blog Muse.   But this recipe came from Rob's partner, David!  David is an uber talented decorator...their home is simply amazing...and apparently he is working on his culinary skills as well!   Thanks for sharing David!

 Couple notes:
  •  Roll  out as thin as possible.  They transfer to a baking sheet easily, even though they are paper thin. 
  • After topping with salt, use a rolling pin to gently press the salt into the dough before baking.
  • Use good salt (I used Kosher). Use good Olive Oil (Extra Virgin) and fresh Rosemary.
  • I made mine rustic, but you can cut into any shape you prefer.
  • Vary this recipe easily with any herb or leave plain...good no matter what! 
  • Oh and each large cracker only has 66 calories...munch on!
Ingredients

1 3/4 cups flour
2/3 cup water
1/4 cup good olive oil 
1/4 teaspoon salt

Preheat to 425

Mix all ingredients in your *Kitchen Aid using the bread hook.  Knead for 5 minutes or so until dough is silky smooth  
Let it rest for 20 minutes. 
 (*if you don't have a Kitchen Aid, your hands will work just fine! Just make sure you knead it well.) 


Cut dough into 8 small pieces. 
 
 
 Roll out each piece on well floured board until very thin. Each piece will make 2 long crackers. 


Place on silicone mat, parchment paper or spray cooking pan lightly with non stick spray.


Bake for 10-15 minutes or until lightly brown.


Saturday, January 26, 2013

Skinny Caeser Dressing


Personally, I love Blue Cheese Dressing...Marie's Blue Cheese Dressing to be exact. However,  there comes a time when you have to make a change for the sake of your waistline and arteries....and up until now, I really couldn't find anything that was a decent substitute. But this stuff is good...really good!  2 Tablespoons of Olive Oil in the whole recipe makes it artery friendly.

I adopted this from skinnytaste.com.  A blog I have mentioned several times.  I love her low cal stuff and I don't really like low cal stuff, so that's quite a compliment.
 I modified this recipe a bit, to increase the yield and I used anchovies paste opposed to a jar of anchovies.  Anchovy paste will last a good long time, a jar of anchovies...not so much.

The first thing my blogging muse, Rob said to me when I told him I made this is:  'ewwww Anchovies, I hate Anchovies!' (just want you to know, he said it like a girl).  Now I love Rob, but he doesn't  'do fish',  so I don't think he properly represents the  Anchovy.  Let me just say, if you do not use Anchovies in this recipe, I do not see the point in calling iti Caeser.   Caesar dressing IS all about the Anchovies. It is what made you fall in love with the dressing in the first place!  If  you choose to ignore me and make it anyway,  it will still be good, but it will not be Caesar, it will be Creamy Dijon with Lemon.  Do whatever, I'm  just sayin'...


Ingredients

1/2 cup grated Parmesan
1/3 cup fresh lemon juice
1 large garlic clove
1 tbsp Dijon mustard
1 tablespoon anchovies paste
2 tbsp extra virgin olive oil
1/2 cup Plain Greek Yogurt

Directions:
In a food processor or blender, add the cheese, lemon juice, garlic clove, mustard and  anchovies paste. Blend for about 20 seconds. Add the oil and yogurt and blend for another 30 seconds or so.

Makes about a cup.
 
 .


Pin it


Thursday, August 9, 2012

Turkey- Pepperoni Burgers with Pesto Mayo


We have been eating a whole lot of ground turkey lately (organic of course), in lieu of ground beef.   I still think beef makes a better burger but this recipe should kick your turkey buns up a notch!

Chopped up pepperoni slices, some pesto mayo, provolone and yumbo! 
If you dont' have pesto on hand, mix a little garlic and dried basil with your mayo for a very close rendition. 

I like to cook my turkey burgers in a cast iron or nonstick pan instead of the grill, they are much juicer.  But if you choose to use the BBQ, for heavens sake don't press the burger patty down with your spatula ...jeeze that just makes me nuts when I see people doing that!  All the juices go right to the bottom of the BBQ and you are left with a turkey burger carcass.

Another trick for a juicier turkey burger is to avoid cutting into the burger with a knife when checking for doneness, this releases all the juices.....press down on the patty with your finger, if it is firm in the center,  it is done.  (Should feel like pressing on the ball of your hand...if you have really fat hands then I would pass on this technique and buy a good thermometer).

Wednesday, June 20, 2012

Crunchy Oven Baked Shrimp with Peachy Dipping Sauce


Crunchy Oven Fried Shrimp with Spicy Peachy sauce!  I can't get enough of them!  I will make the peach sauce over and over again, I can already taste it with salmon and turkey burgers and pork chops and chicken and fish and...well you get the point. It's yummy!

The sauce is so simple, it is made out of peach preserves, ground ginger, honey and hot sauce...nuke it a minute and instant dip!  You can even use sugar free preserves and get amazing results.

I tried the shrimp a couple different ways - soaked in buttermilk, dipped in egg, and just Panko and then dipped in regular bread crumbs and then again with a bread-Panko combo, and that was the best. These little wonder shrimp have been tested and re-tested.  (Thank you Mr. Kirk for your very valuable opinion...he has a very tough job, being my official taste tester.)
The shrimp are also very low in calorie, so make tons and double your batch of the peachy sauce to go with everything you are cooking this week!


Saturday, May 19, 2012

Homemade Ricotta Cheese


I made this again...I just had to see if it was as good as I remembered, and girlfriend...mmmmmm,mmmmm,mmmmm.

I truly don't think this recipe got the attention it deserved the first time, so I am reposting.  Listen to me my fellow foodies, put  your ear closer to your computer screen so you can hear what I am saying.   You must try this recipe!  

I will expect a full report on how it has changed your life...how you will never, ever buy store bought Ricotta again.  How the smooth, warm, silky taste of this cheese has altered your foodie being.  I know, I know...I get emotional too....hold me...just hold me....


Thursday, May 17, 2012

Homemade Garlic Croutons


For my friend Holly who is always looking for new uses for old bread! 

I used wheat, white and threw in a few stale Sweet, Sexy Dinner Rolls.  Made a nice medley!
This is one of the few recipes I have that is actually better with garlic powder in lieu of fresh garlic. Fresh garlic tends to burn and just lay on the bottom of the pan when cooking at high heat.
You can also add a sprinkle of Parmesan right when you take them out of the oven. 
These make your usual salads really special and they are so easy to make!

Monday, February 6, 2012

Salmon Cakes with Creamy Tarragon Vinaigrette

These are so tasty and so easy to prepare.   Make the patties ahead of time (up to a day in advance) and then saute them up...and guess what? ...you are  a salmon patty cookin' rock star!  Woot!  Woot!

I have heard rumors of taste bud impaired cooks using canned salmon for these, but I refuse to believe it.  It's just bad cooks talkin' smack.  Who would use canned salmon in Seattle?  Fresh is the way to go...Costco my friends...Costco.

I based this on a recipe from Ina Garten (she is such a favorite chef of mine!)  Everything she does is so fresh and simple.

The Tarragon Vinaigrette is my own recipe, and worth keeping because it goes so well with just about everything...try it on fish taco's, very yummy.

Don't let the ingredient list and directions scare you away from this recipe...basically, all you are doing is sauteing veggies and tossing with cooked salmon.  If you have left over salmon you are already half way there!


Ingredients

For Salmon Cakes

1/2 pound fresh salmon
Good olive oil
salt and freshly ground black pepper
4 tablespoons unsalted butter
3/4 cup small-diced red onion
1 1/2 cups small-diced celery 
1  cup small-diced red bell pepper 
1/4 cup minced fresh flat-leaf parsley
1/4 teaspoon hot sauce
1/2 teaspoon Worcestershire sauce
1 1/2 teaspoons crab boil seasoning (I used Old Bay)
1 cup bread crumbs
1/2 cup good mayonnaise
2 teaspoons Dijon mustard
2 extra-large eggs, lightly beaten

For Tarragon Vinaigrette
1/2 cup good olive oil
1/4 cup white vinegar
2 tablespoons Dijon mustard
1 tablespoon fresh tarragon chopped or 2 teaspoons dried
2 heaping tablespoons good mayonnaise
salt and pepper to taste

Preheat oven to 350 degrees.
Place the salmon on a sheet pan, skin side down. Brush with olive oil and sprinkle with salt and pepper. Roast for 15 to 20 minutes, until just cooked.  Allow to rest for 10 minutes and refrigerate until cold.
Meanwhile, place 2 tablespoons of the butter, 2 tablespoons olive oil, the onion, celery, red and yellow bell peppers, parsley,  hot sauce, Worcestershire sauce, crab boil seasoning, 1/2 teaspoon salt, and 1/2 teaspoon pepper in a large saute pan over medium-low heat and cook until the vegetables are soft, approximately 15 to 20 minutes. Cool to room temperature.

Flake the chilled salmon into a large bowl. Add the bread crumbs, mayonnaise, mustard, and eggs. Add the vegetable mixture and mix well. Cover and chill in the refrigerator for 30 minutes. Shape into about 8 to 10 cakes.

Heat the remaining 2 tablespoons butter and 2 tablespoons olive oil in a large saute pan over medium heat. In batches, add the salmon cakes and fry for 3 to 4 minutes on each side, until browned. Drain on paper towels; keep them warm in a preheated 250 degree F oven and serve hot
Tarragon Vinaigrette
Mix all ingredients well and chill for at least 30 minutes before serving


Spoon vinaigrette over warm salmon cakes and serve.

Friday, January 27, 2012

Homemade Ricotta Cheese


I made this again...I just had to see if it was as good the second time...and girlfriend...mmmmmm,mmmmm,mmmmm. 
I truly don't think this recipe got the attention it deserved the first time, so I am reposting, hoping you will give this a try. 
 If you can heat up milk, you can make homemade ricotta cheese and if you can't heat up milk, you should probably take up crochet, go for a walk and stop blogging recipes.  Not judgin'...just sayin'...


I must have an Italian gene somewhere...what is it about Italian food that just gets me?  Tomato, cheese, pasta, bread....it is the very reason I cook...or eat for that matter!  Making cheese has been on my bucket list for a long time...if I had any idea it was this easy, I would have done it a very long time ago. 
Once tasted, it will now be very difficult to buy in a grocery store ever again.   Served warm it is out of this world.   Not overpowering at all, just a nice subtle flavor.  I could almost describe it as under whelming, it is smooth, creamy, rich and simple all at the same time. From start to finish the whole process didn't take much more than an hour and most of that time is spent letting the cheese drain.
 I read for hours, (literally), every recipe for homemade Ricotta that I could find on the web.  I couldn't find two the same.  To curdle the milk some use buttermilk or yogurt, or lemon or vinegar.  I couldn't decide and I liked the idea of the lemon so I used lemon juice and also vinegar for an extra punch..next time I'll try it another way...or whey ...ha! I love cheesey humor!
I'll be using my fresh Ricotta tonite in lasagna rolls and I can't wait!  I was so tempted to whip up a fresh baguette this afternoon but didn't, such discipline...am I skinny yet?

I've listed the nutritional information and I think you will be pleased by the numbers.
This will only last about 3 days in your fridge so eat it up or share with those you love!

Serving size: 1/4 cup
Calories: 100
Fat: 5 grams
Carbs: 7 grams
Fiber: 0
Protein: 7 grams
WW Points+: 3

Ingredients
Yield: approximatly 3 cups of fresh Ricotta
8 cups whole milk
1 cup heavy cream
3 tablespoons fresh lemon juice, strained
3 tablespoon white vinegar
1 teaspoon good salt (I used Kosher)

Pour milk and cream in large stock pot.  Bring to a simmer on medium heat.  Cooking thermometer should reach 190 degrees (or just before boiling point).


While milk is cooking juice 2 lemons and strain.

When milk mixture has reached 190 degrees, remove from heat and add lemon juice, vinegar and salt.  Continue stirring for 1 to 2 minutes while curds form.
Allow to sit at room temperature for 10-15 minutes.
Double line a colander with cheese cloth.
Pour milk mixture in to colander.


Let drain for about 30 minutes...now there are many ways to do this and most folks just let it sit in the colander and drain...but not me!  I read somewhere that you can tie it to your faucet and it will drain faster, so I had to give it a try!  If you can get away with this without your family hauling you off to the foodie loony bin then I say give it a try!  Either way you will have good results!


When your Ricotta has reached desired consistency...remove from cheese cloth and store in an airtight container for up to 3 days.

This is just the first of my cheese making endeavours...I can't wait to try mozzarella...stay tuned!


Monday, December 26, 2011

Baked Ziti with Sausage and Bechamel


Cooked ziti pasta  mixed with sausage, marinara sauce and topped with a creamy bechamel. I love me some tomato and cream flavors and this made my heart go zing!    Don't be intimidated by the bechamel, it's just a simple white sauce...and if you have never made white sauce before, this is going to improve your cooking skills by about 100 percent.  You will be able to make Alfredo, saucy chicken, creamy shrimp...the sky is the limit once you master this simple sauce!

This recipe is a real crowd pleaser too.  Feeds about 8-10 hearty appetites.   Add salad and bread and it's a perfect buffet dinner.

Monday, November 7, 2011

Cranberry Orange Chutney (Canning friendly recipe)


This recipe produces a cranberry that taste's like a cranberry! You get a tart sweet taste. If you prefer a more sweet version, increase the sugar and brown sugar by 1/2 cup each.
You can can...(funny huh?) or not can this recipe. If you choose to can, use the hot water method and follow the directions from the National Center for Home canning. Super easy and these make great little gifts!


Cranberry Orange Chutney

  • 24 ounces fresh whole cranberries
  • 2 cups chopped white onion
  • 2 cups golden raisins
  • 1½ cups white sugar
  • 1½ cups packed brown sugar
  • 2 cups white distilled vinegar (5%)
  • 1 cup orange juice
  • 4 teaspoons peeled, grated fresh ginger
  • 3 sticks cinnamon
Yield: About 8 half-pint jars.
Instructions
Rinse cranberries well. Combine all ingredient in large dutch oven. Bring to a boil over high heat, reduce heat and simmer 15 minutes until cranberries are soft, stir often to prevent scorching. Remove cinnamon sticks and discard.
Cool and seal in tight-fitting container for up to one week or preserve, following the link above.

Sunday, October 30, 2011

Pesto

Since I was in my teens, I have been making pesto with my mom.  This was way before I knew what pesto was, in fact, I believe it was before most people knew what pesto was! The recipe was from Gourmet magazine, and although I can not find the original recipe, I believe this one does it justice. 

Pesto
  • 2 cups fresh basil leaves, packed
  • 1/2 cup freshly grated Parmesan-Reggiano or Romano cheese
  • 1/2 cup extra virgin olive oil
  • 1/3 cup pine nuts 
  • 3 medium sized garlic cloves, minced
  • 1 tablespoon fresh lemon juice (optional)
  • Salt and freshly ground black pepper to taste
Combine the basil in with the pine nuts, pulse a few times in a food processor.   Add the garlic, pulse a few times more.
 Slowly add the olive oil in a constant stream while the food processor is on. Stop to scrape down the sides of the food processor with a rubber spatula. Add the grated cheese and pulse again until blended. Add a pinch of salt and freshly ground black pepper to taste.

If not using within a few days, this can be put in containers, sealed with a drizzle of olive oil and kept frozen for 6 months. Makes approximatley 1 cup. 
NOTE: one bunch of basil is roughly equivelent to 2 cups of packed leaves.  Hunt your local farmer market in September for the best deals as the season end.